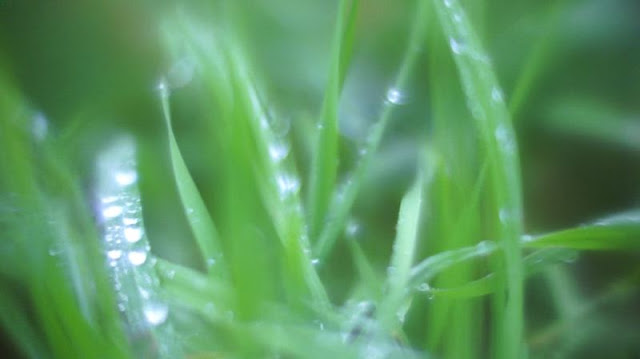
Or how I crafted a super fast camera lens from bits and parts... fun!
As a photographer, I've had many photographer friends in my life, amongst which fast lenses were often a highly sought after item.
The price of such lenses - for example the Leica Noctilux - is usually a ridiculous amount of money to spend on a camera lens, ranging sometimes up to 15,000$.
Some of my photographer friends would save up for long periods of time before they could finally buy one, others would simply give up on the idea, bitter or saddened by the unattainable perfection of their dream lens.
Among filmmakers and cinematographers, the sequence in Stanley Kubrick's "Barry Lyndon", which was lit only by the light of candles and shot using a very fast lens that Kubrick had the Nasa make for him, is also the stuff of dreams.
After doing some research, I found that, there were lots of lenses that were built by various manufacturers and for various purposes throughout the history of optical lenses. Some were built to fit on telescopes, some were built to fit on night-vision binoculars, some were built for rifles and other shooting devices, some were built for X-ray machines... and some very fast lenses could be bought second-hand for a fraction of the price of a fast Leica lens.
Finding out about this aroused my curiosity and my imagination. What if I could buy one of these non-photographic lenses, and adapt it to fit one of my cameras? And what if the produced images were of a completely new kind? And what if I could use this lens for both my photos and my films?
Excited by all the possible successful outcomes, and unafraid of the possible negative ones, I decided to buy a second-hand very fast lens (0.75!!), in order to try and adapt it to one of my cameras.
At first, I wasn't sure it could be done. I had bought a gigantic, very heavy object made of nothing but metal and glass, which was built a long time ago to be used in X-ray machines, and its focal plane was extremely close to the back of the lens, which made using it on a film camera or on a DSLR impossible.
Nevertheless, the recent apparition of mirrorless digital cameras, which allowed many photographers to use vintage lenses on their digital interchangeable lens cameras, while avoiding the bulkiness of a digital SLR, was an option I wanted to try. Since there is no mirror in the camera, the distance between the lens and the focal plane didn't need to be as long as it used to with reflex cameras that used mirrors.
I bought a second-hand Sony NEX-3 camera, an old model which came very cheap, but used the same mount as every other Sony interchangeable cameras, which would allow me to upgrade later on, if I ever needed to.
Here is how I turned this big piece of glass and metal into a proper "camera lens".
 | ||
| At first, I used an E-mount body cap that came with the Sony NEX. I carved a circular hole right in its middle, to be able to fit the lens into it. |
 |
| Once the caulk was dry, I used another type of cement called "Sintofer" which hardens in a way that can be compared to the hardness of metal, and filled the gaps between the different pieces. |
Finally, this is what the lens looks like on the Sony NEX.
Notice how much bigger (and heavier!) than the camera it is!
Seen from front, the camera almost disappears totally behind its huge lens.
The lens is actually so heavy that I usually attach the camera strap to the lens, instead of attaching it to the camera.
It's also because I'm more worried of the lens falling than the Sony NEX's body falling!
Since I recently dropped digital photography to revert to analog film photography, I don't really use the "Full Metal" lens for still images, but rather for my short films.
I like the results of this experience very much, although I wasn't satisfied with the compression of the NEX-3, so I bought a NEX-5, which is slightly better.
Being nearsighted, I feel that the results look kind of how I see without my glasses.
I also like the fact that so much is blurry in the images, leaving just the foreground in focus and the background becomes a solid colour, kind of the way it would be in old cartoons when the foreground was hand-drawn and the background was painted and it made the foreground stand out so much.
In the end, I find that sharpness is very overrated.
Below are a few images from my short-films that were shot using the “Full Metal" lens...


Comments
Post a Comment